How to create a digital Suica card in Apple Pay (2024 Update)
Board the train in Japan with just your phone
Suica is a smart card used to pay at train stations and convenience stores in Japan. In 2016, Apple added support for Suica to Apple Pay on iPhone 7 devices sold in Japan. In 2017, Apple added support to all iPhone 8/X and later, regardless of where they’re sold.1
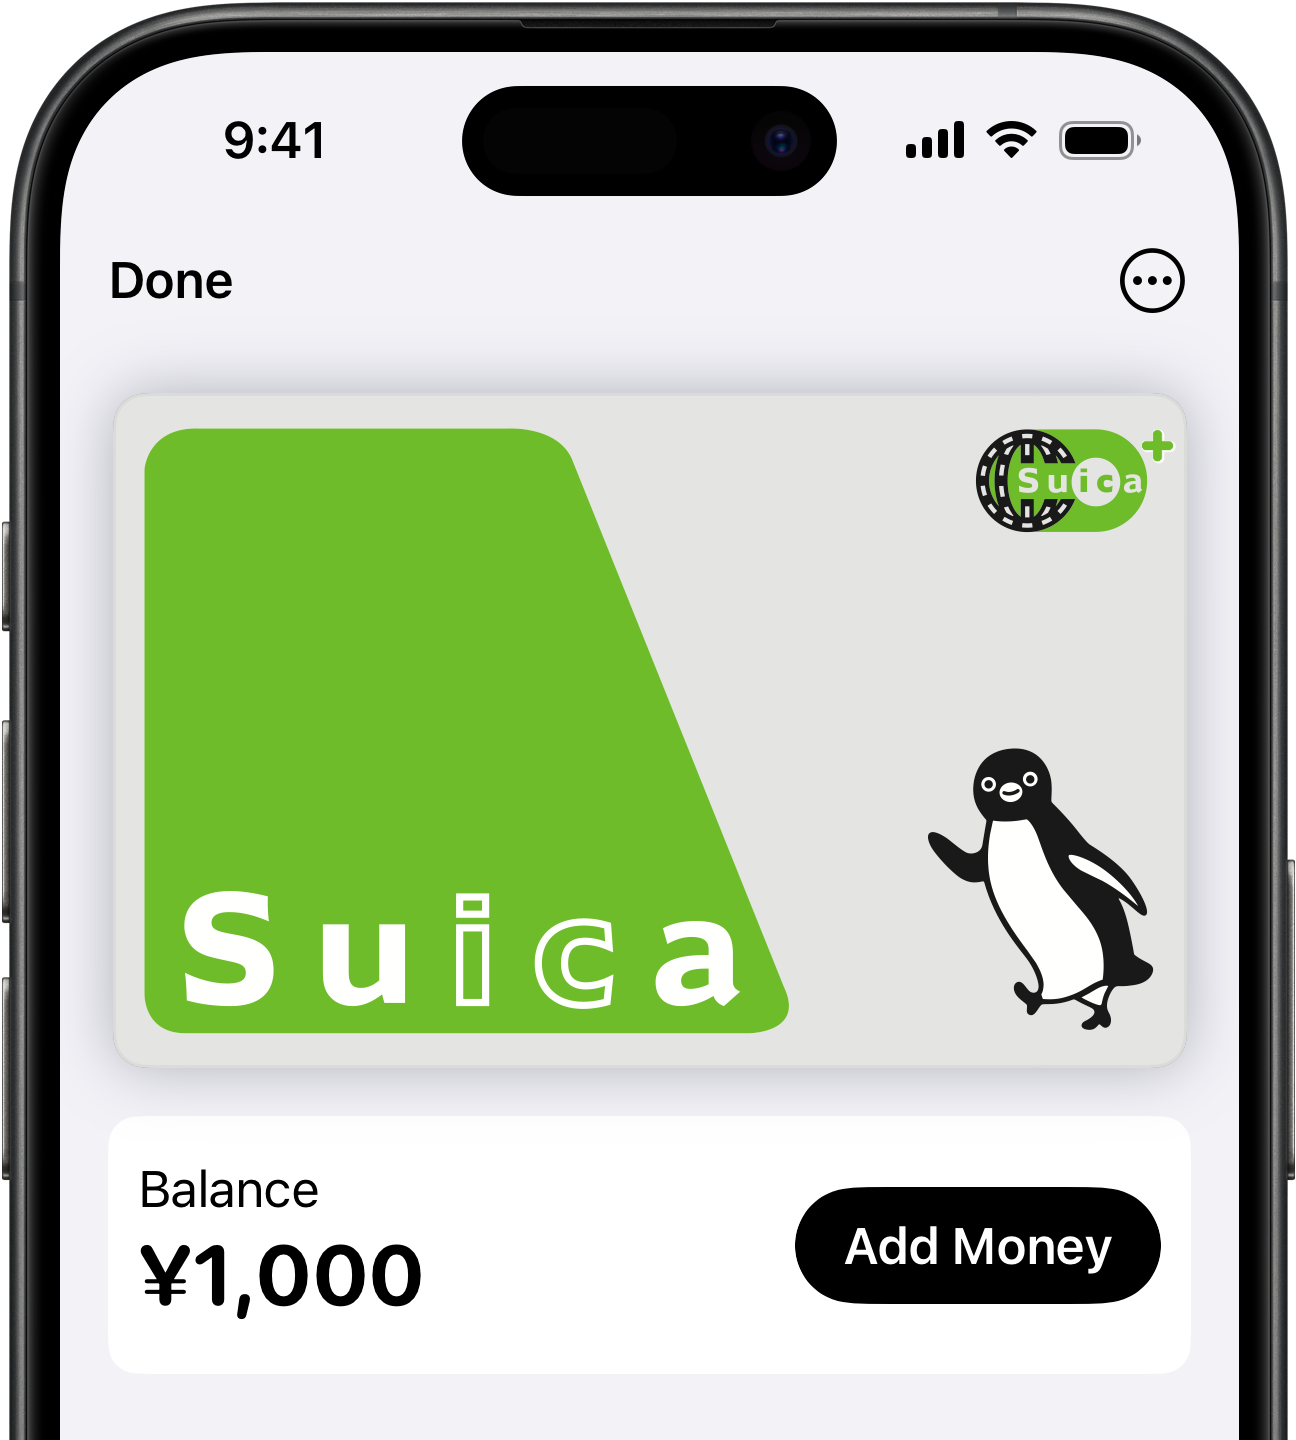
Virtual Suica card in the iOS Wallet app.
But there are some limitations. When a physical Suica is transferred to Apple Pay, the physical card cannot be used anymore. This could be inconvenient if you prefer to keep your physical card active as a backup. To have the best of both worlds, you can generate a new Suica just for Apple Pay.
Generating a new card with the Suica app (2024)
This section was last updated on .
Download the Suica app on the App Store.2
Note that the Suica app is only available in Japanese as the English version has been discontinued. However, you can still use the app by following the screenshots below.
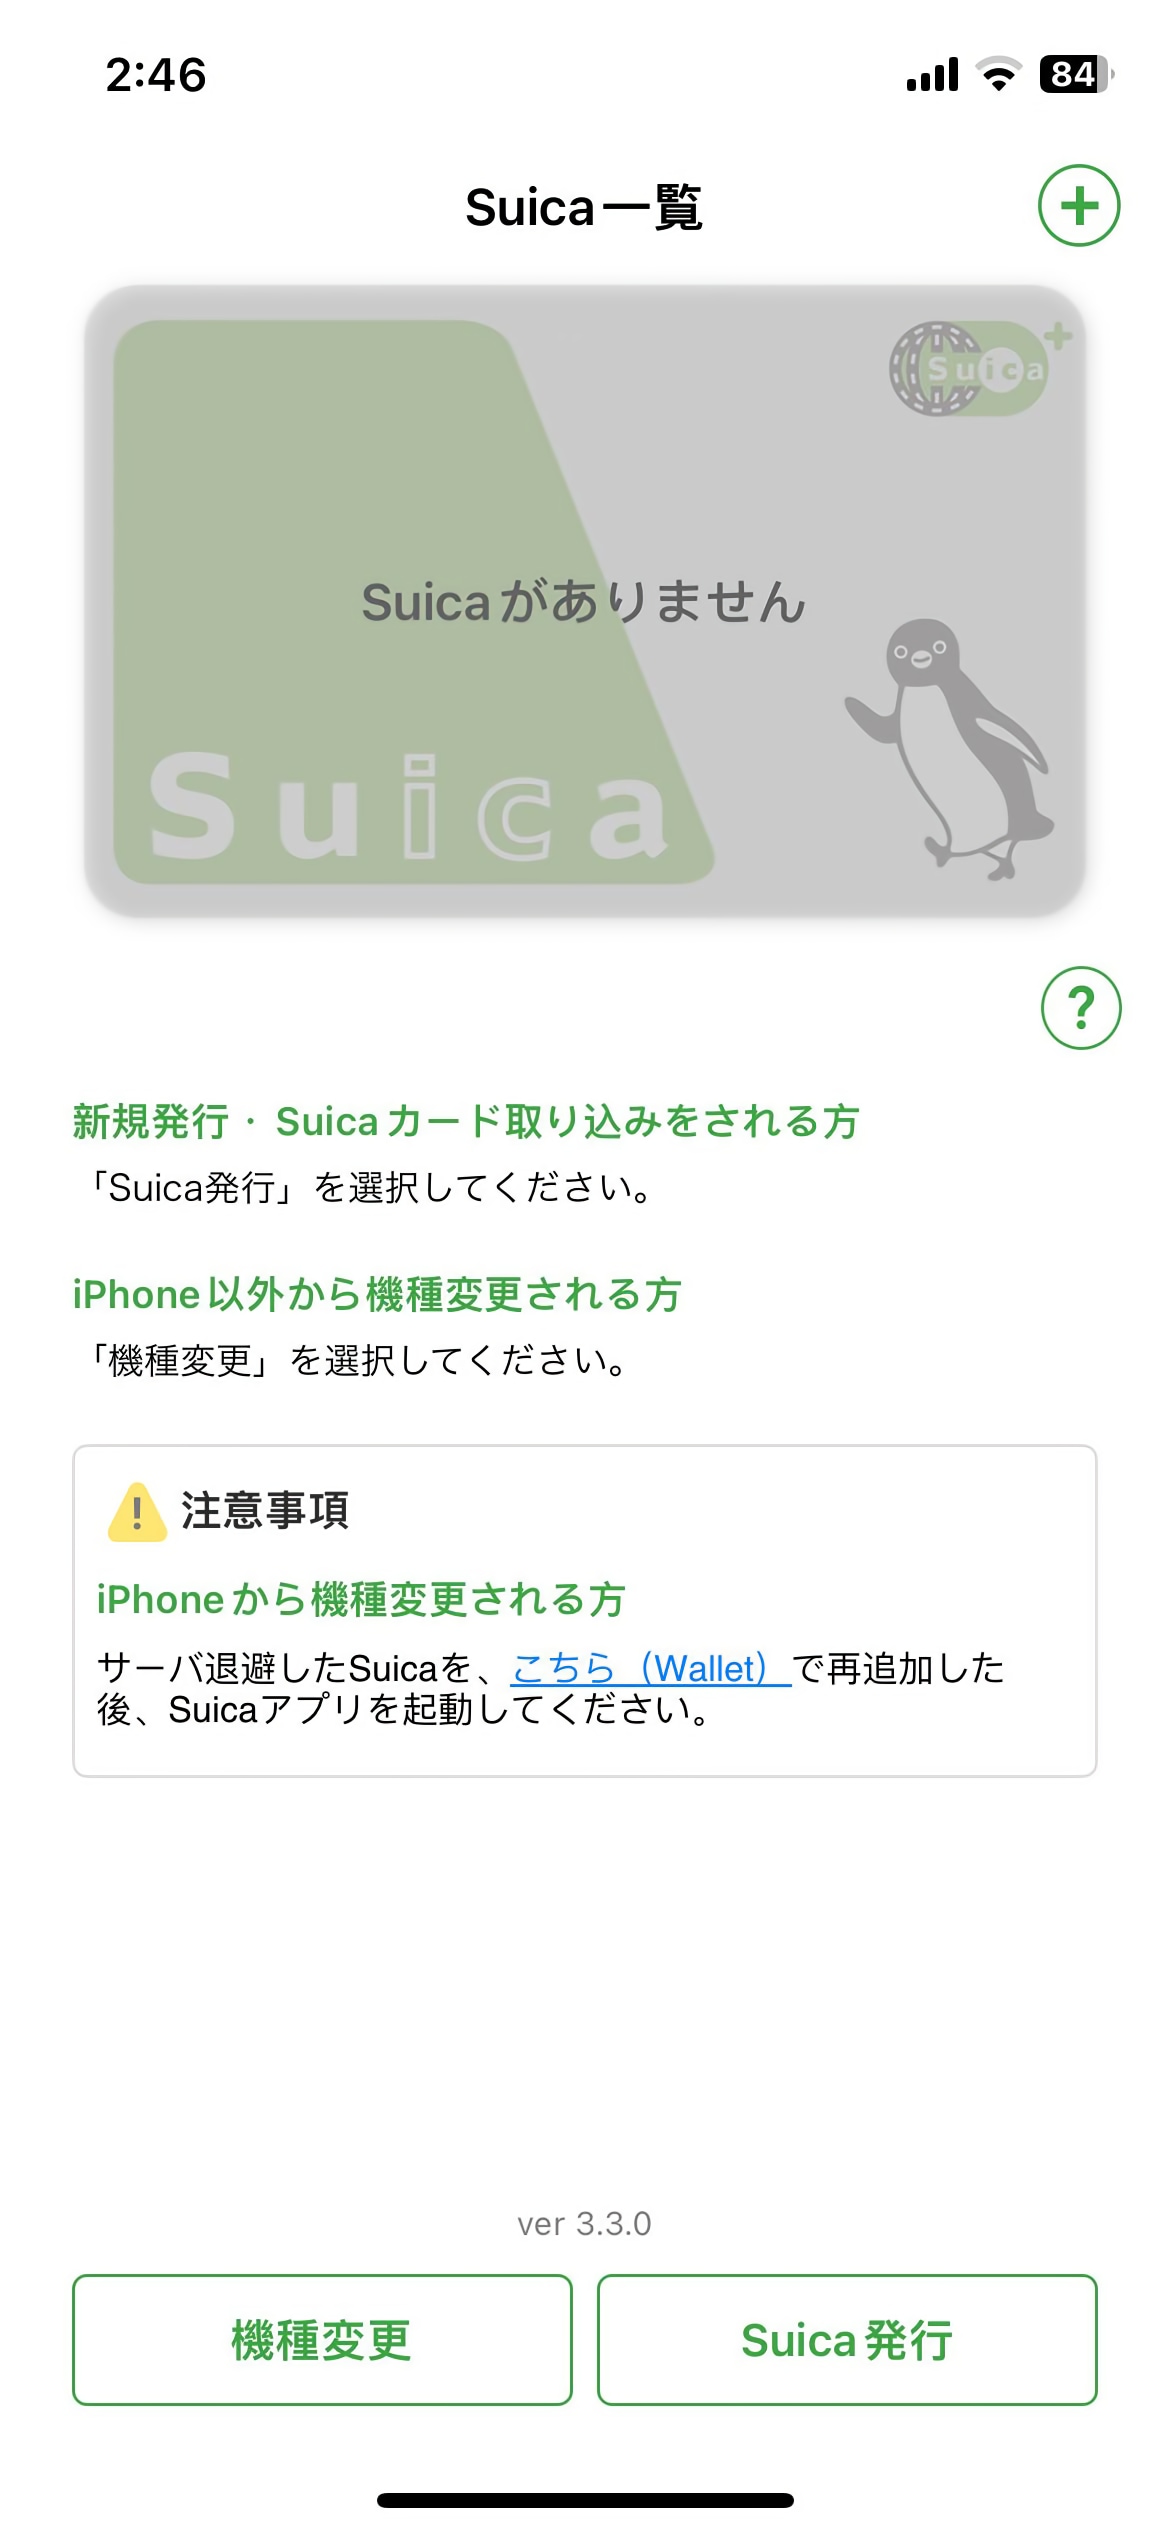
The app opens to a grayed-out Suica card. Tap the plus (+) button in the top right corner.
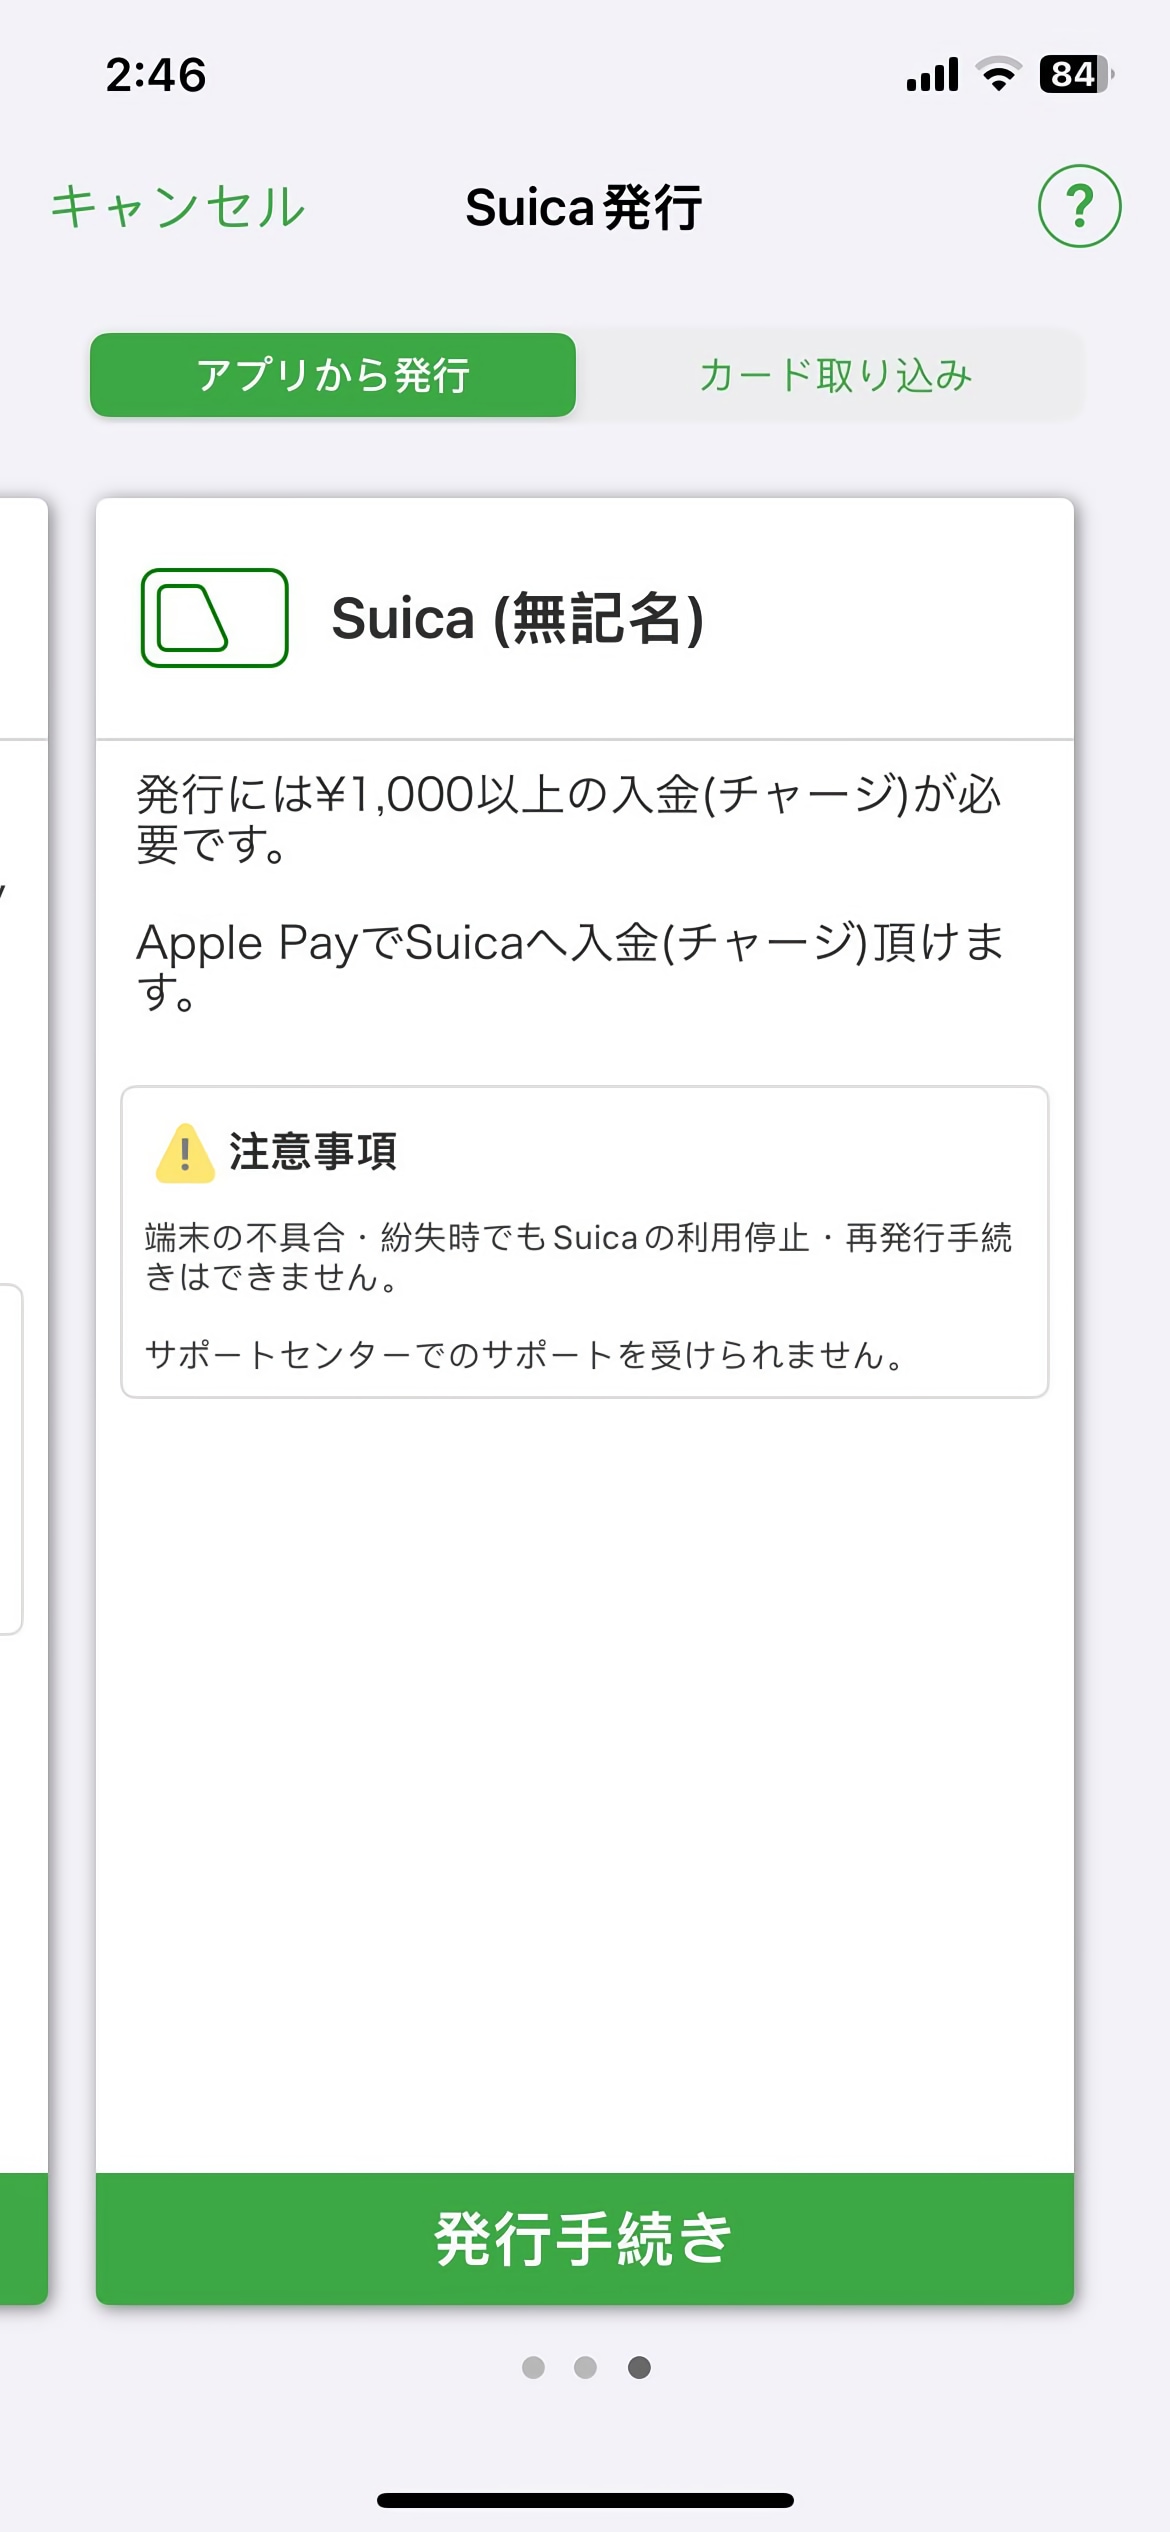
You can now choose between several types of Suica. Scroll to the last option, which is the anonymous (無記名) Suica. Tap the green button at the bottom of the screen:
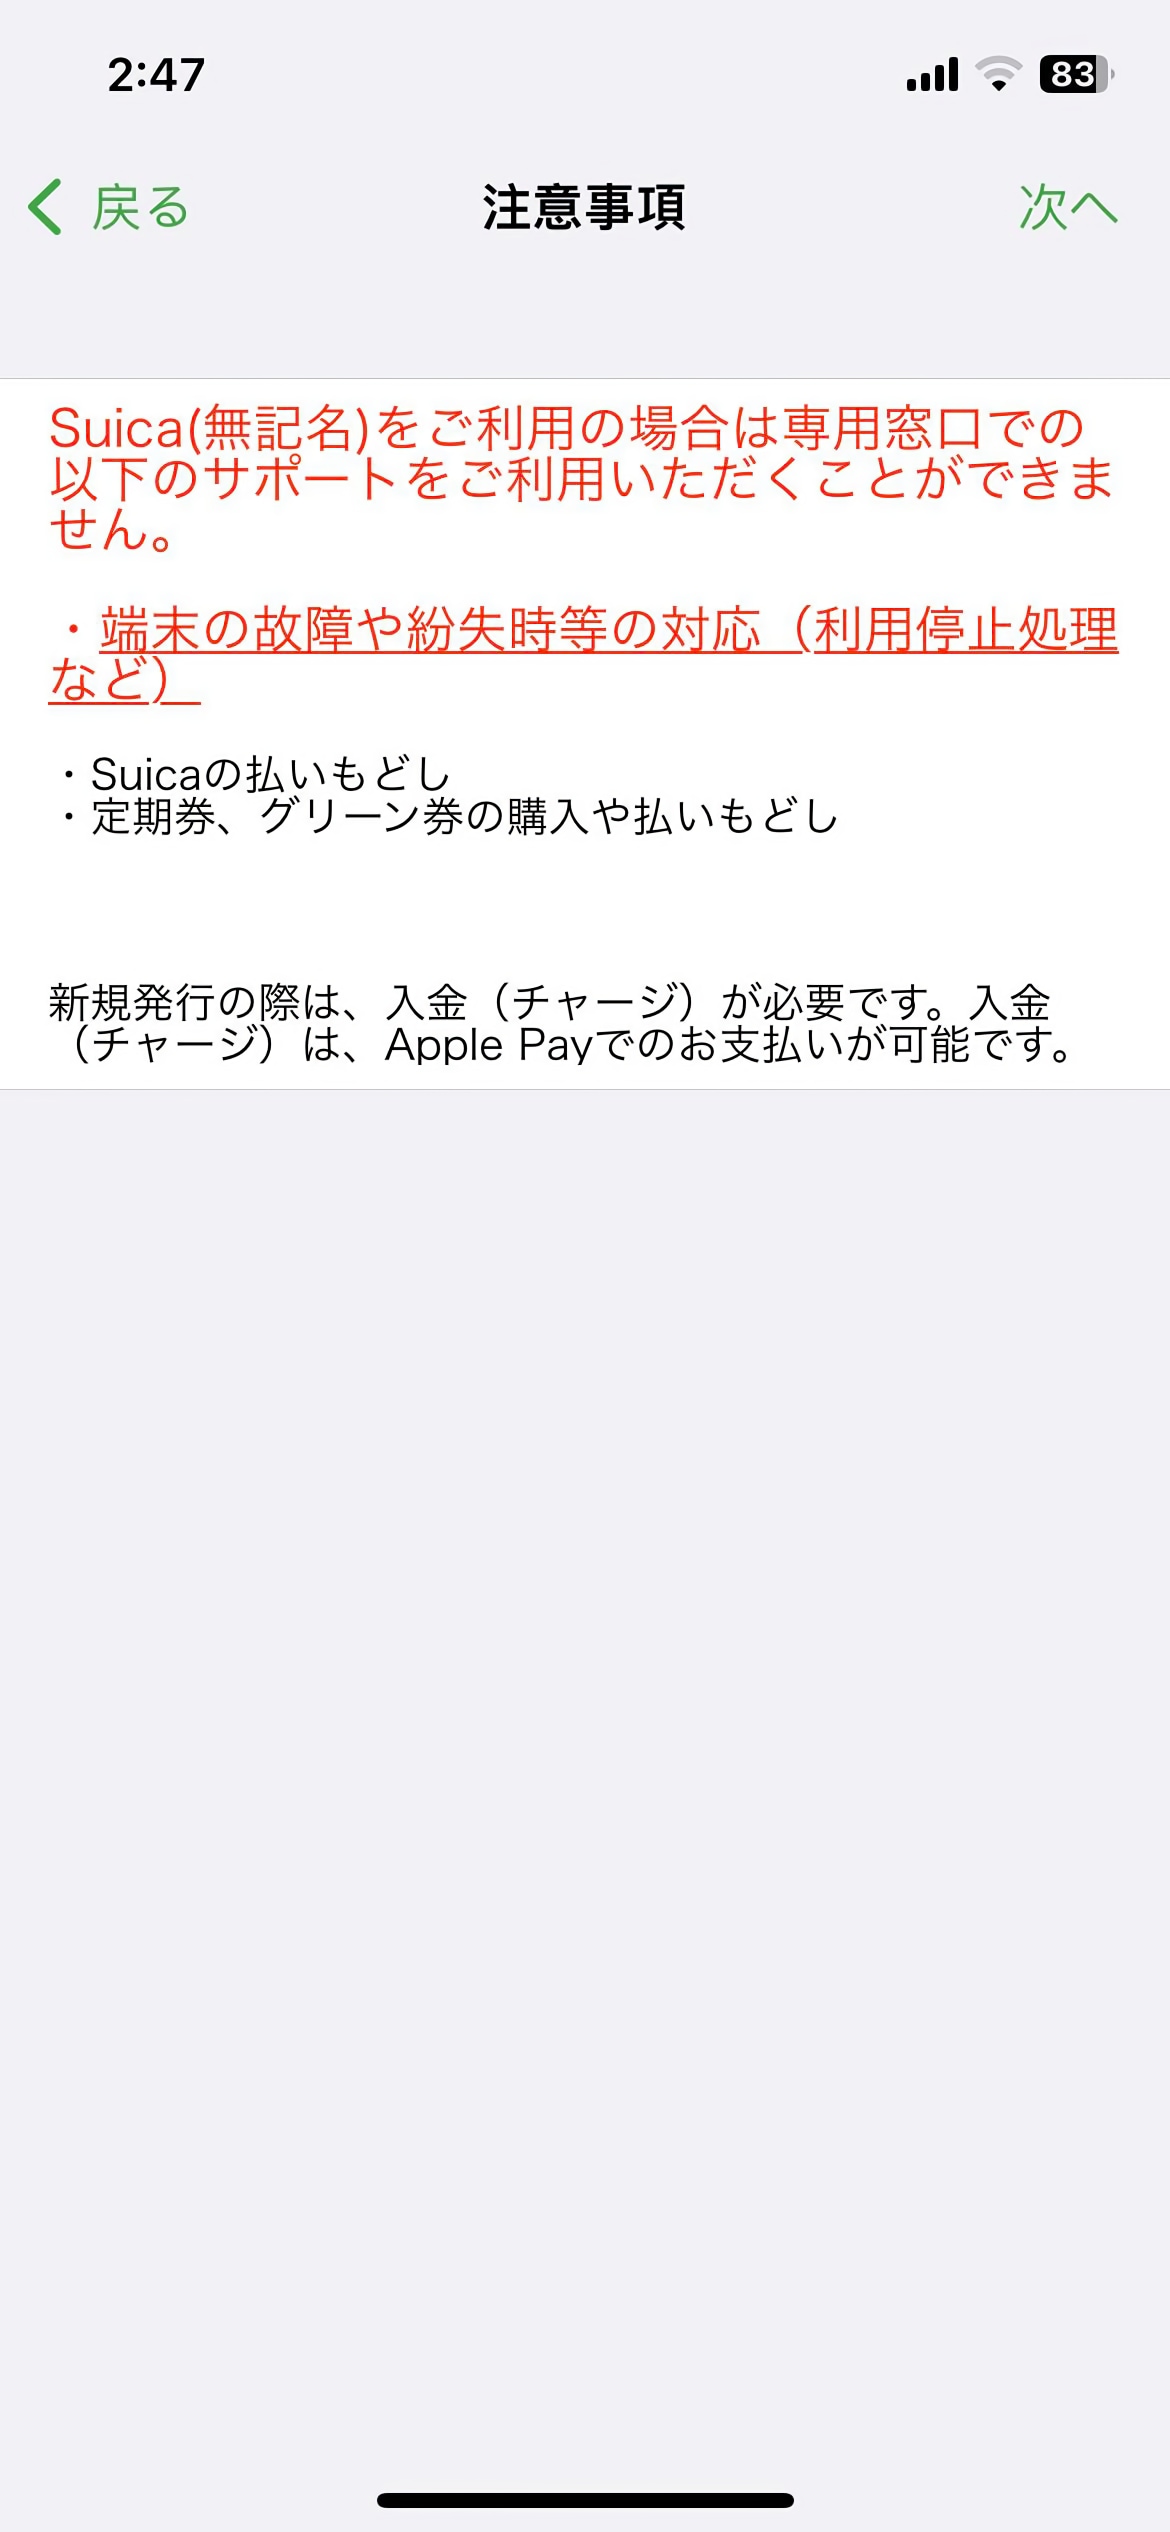
The next screen reminds you about the restrictions of anonymous cards. You will not be able to receive these services at the customer service counter:
- Suspending the card in case of a lost or stolen device
- Refunds
- Purchasing commuter passes
Tap the button in the top right corner to continue.
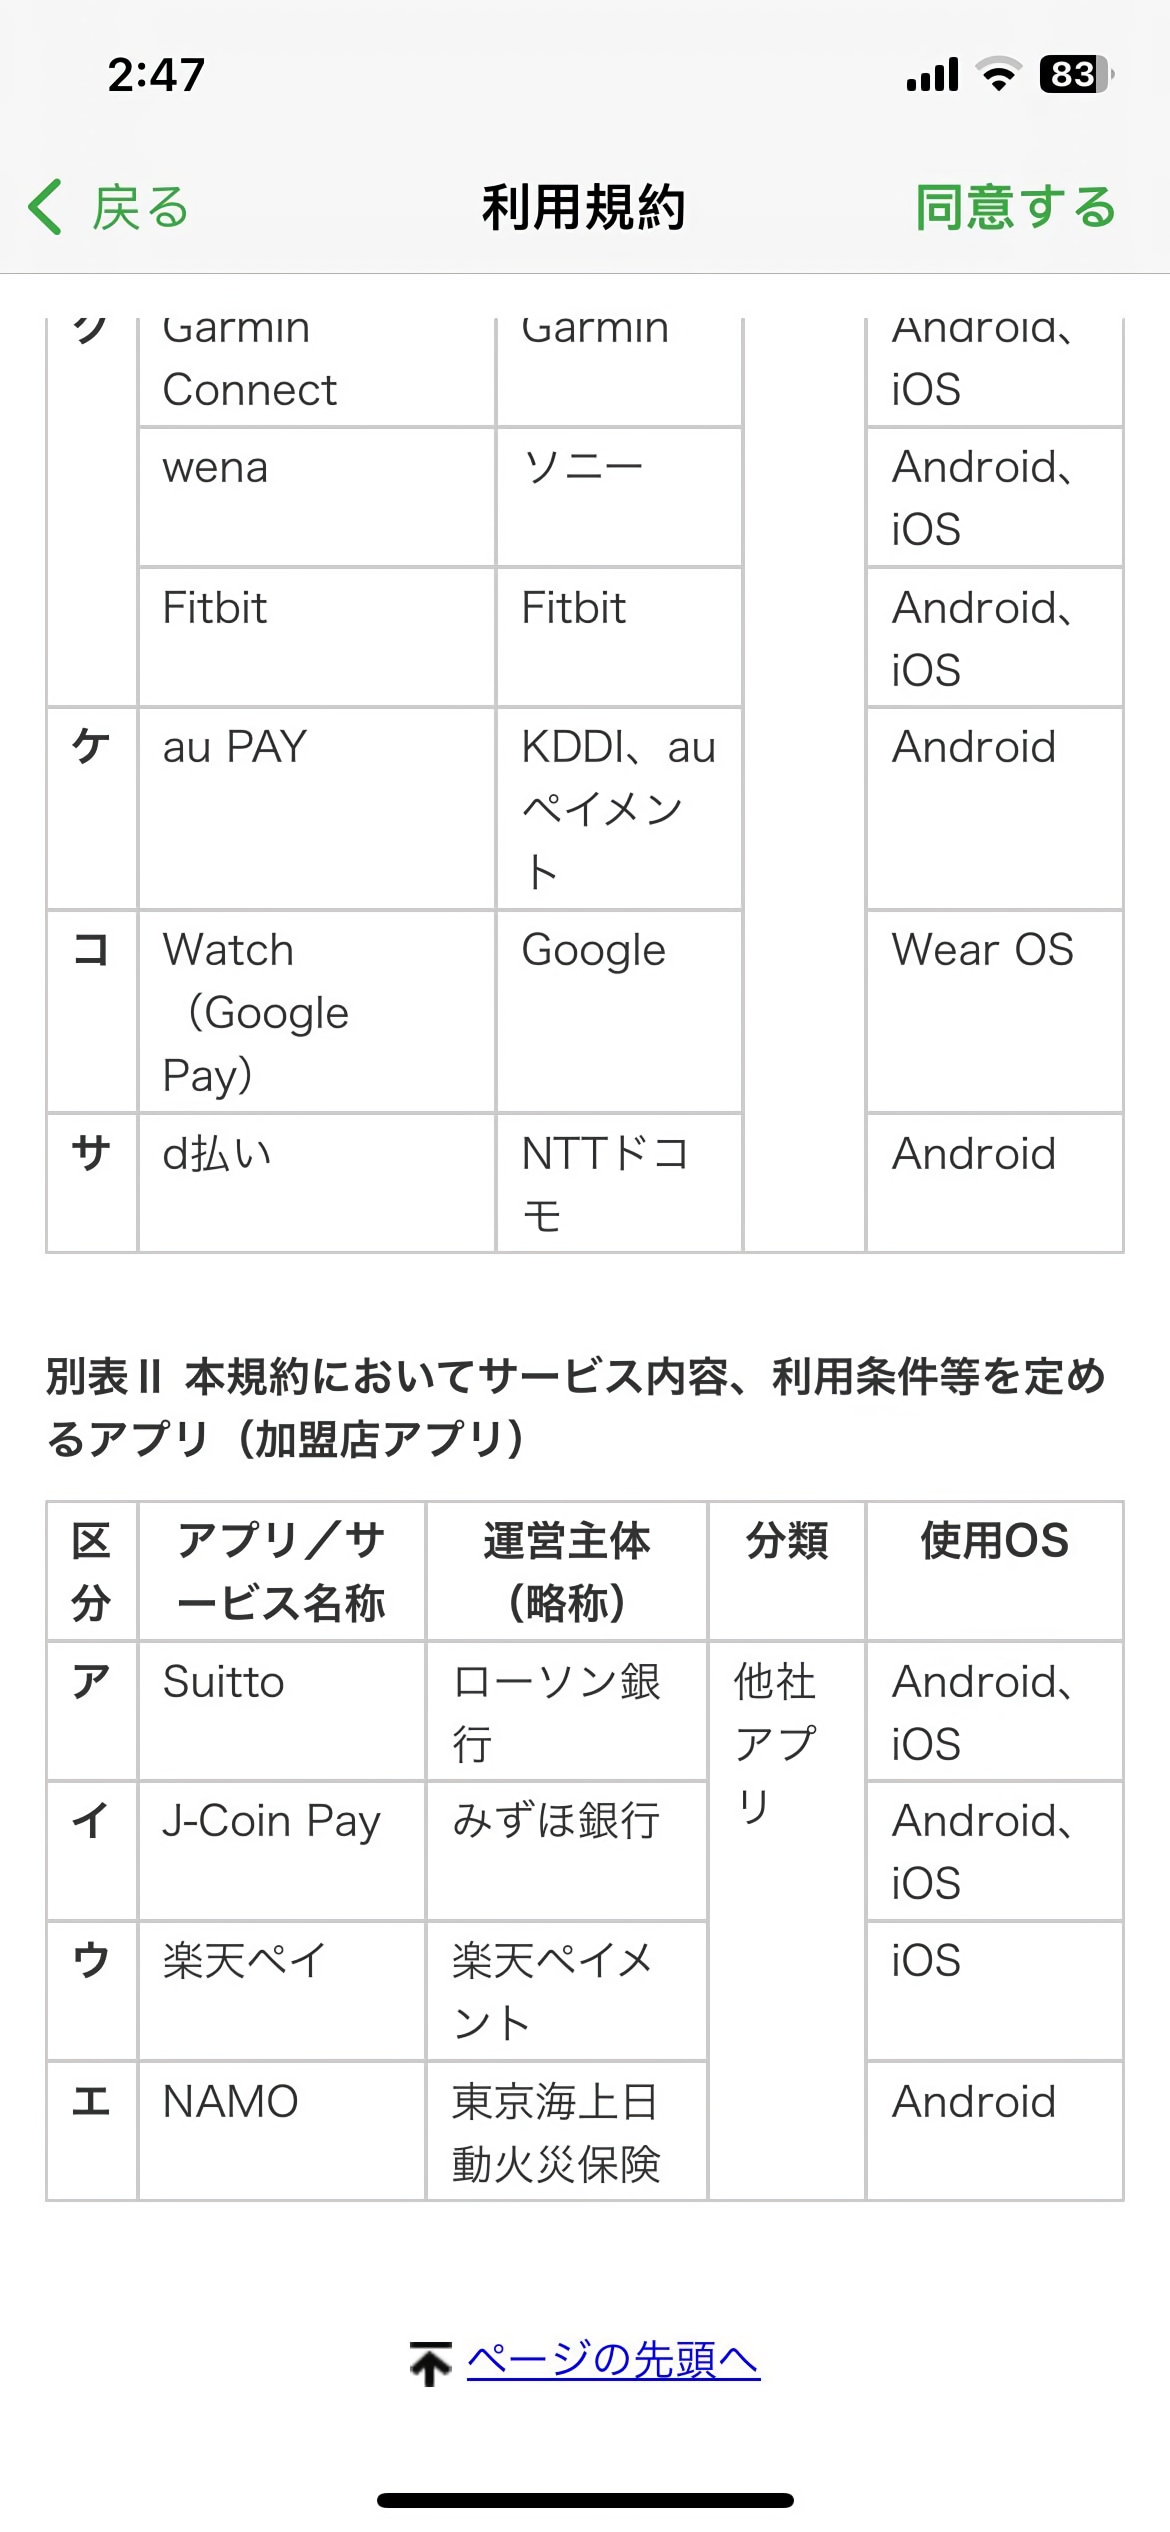
The next screen shows the terms of service. There are two agreements in the list. Tap each one to read it.

Scroll to the bottom of each agreement, then tap the button in the top right corner to accept the terms.
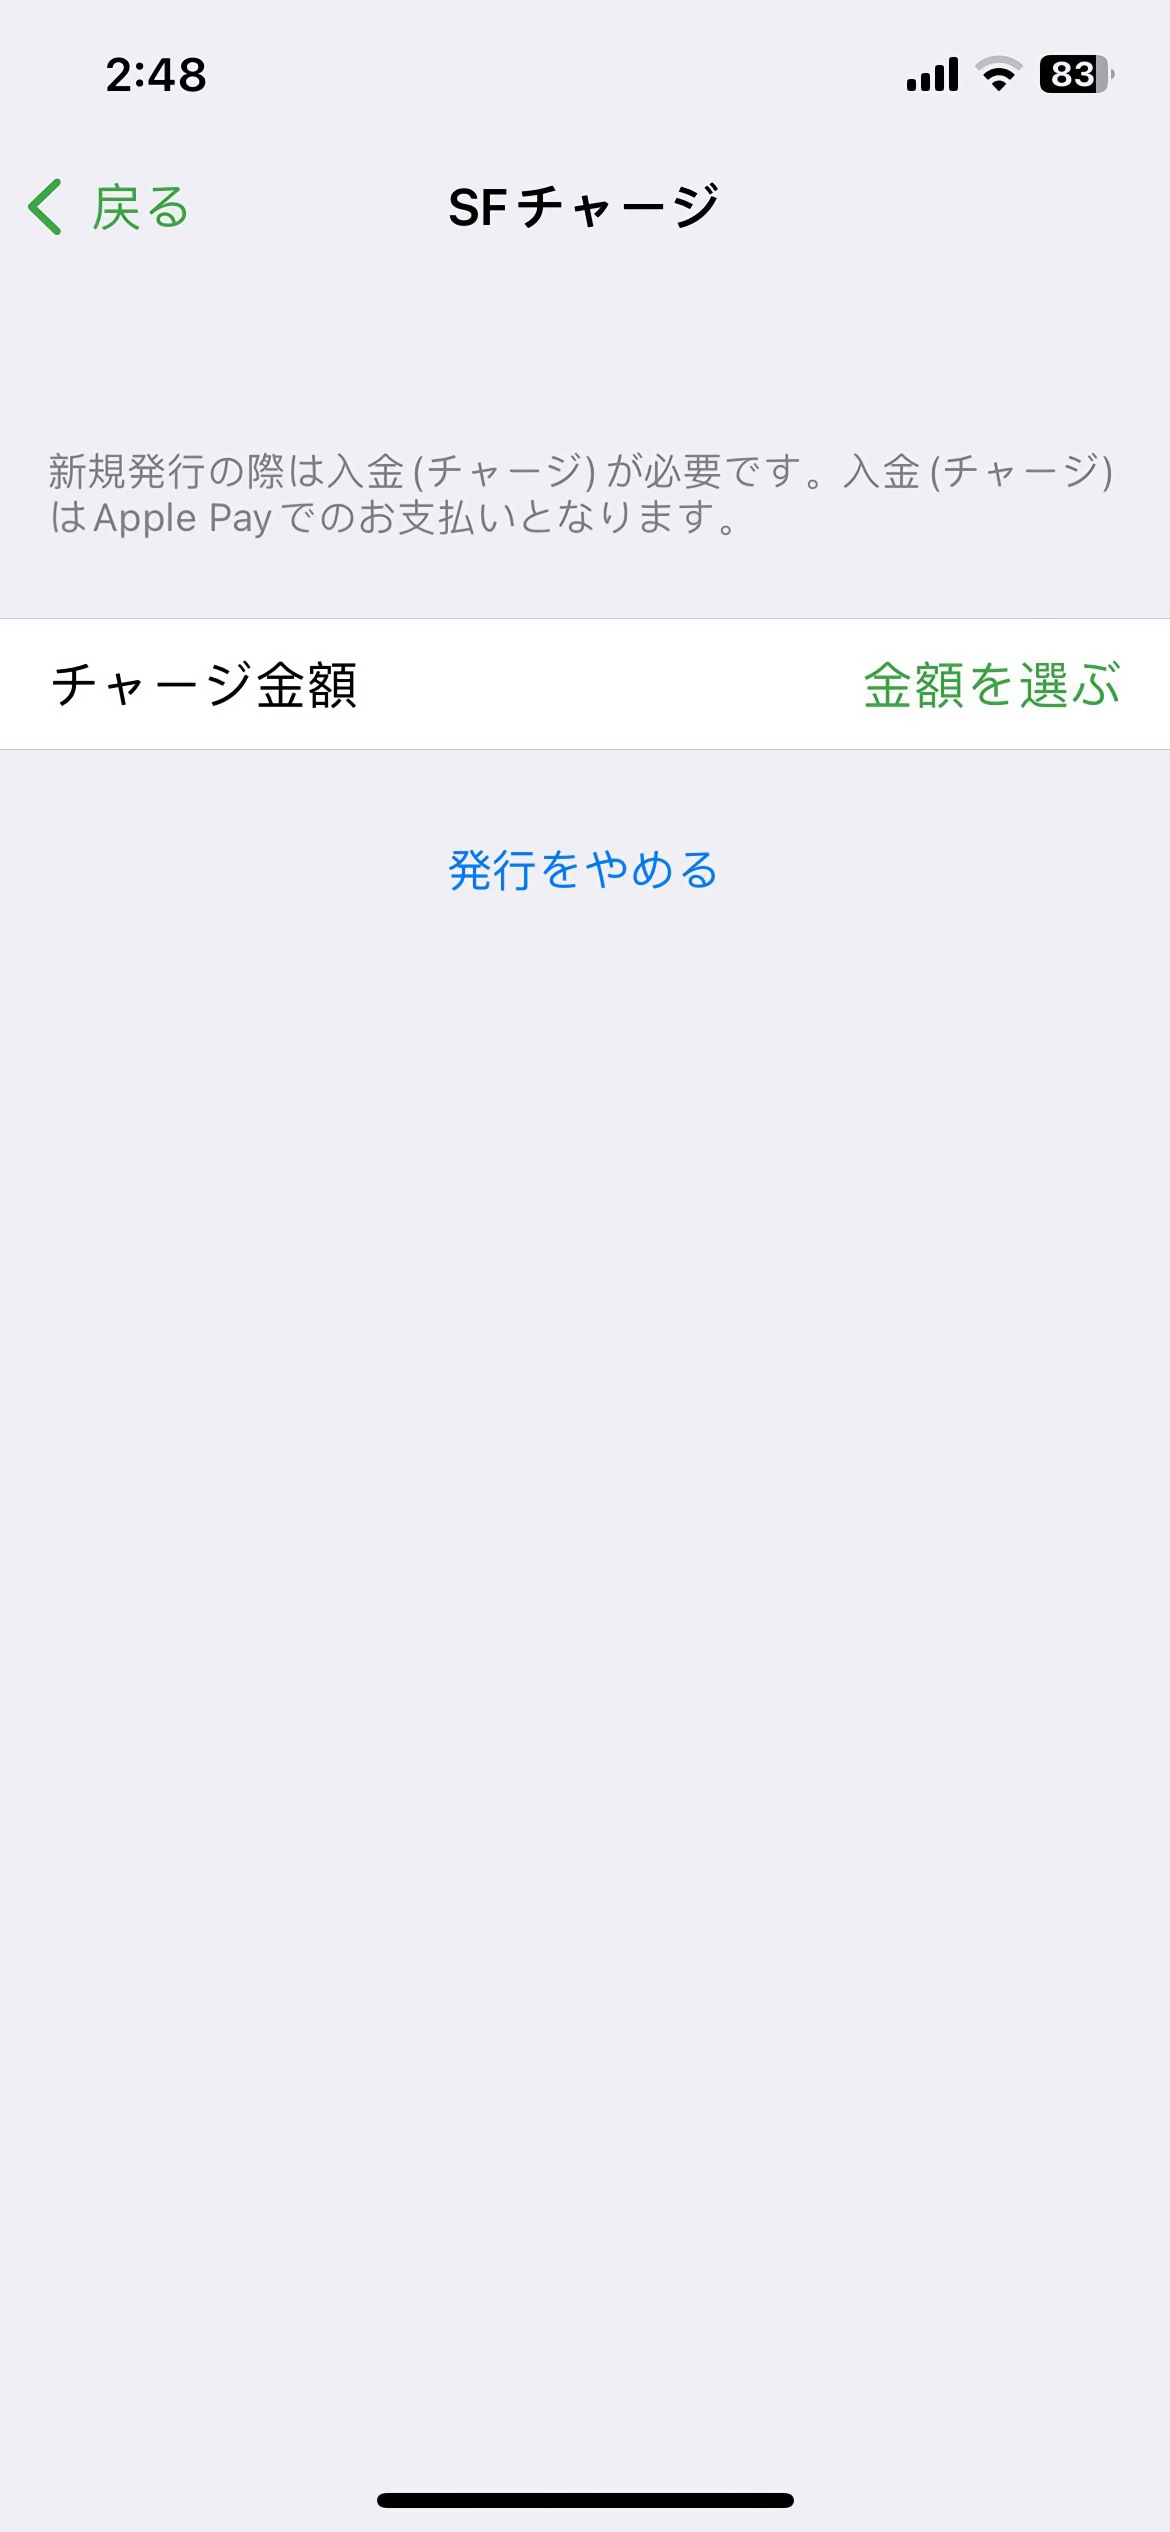
Tap the white table cell to set the card’s initial balance.
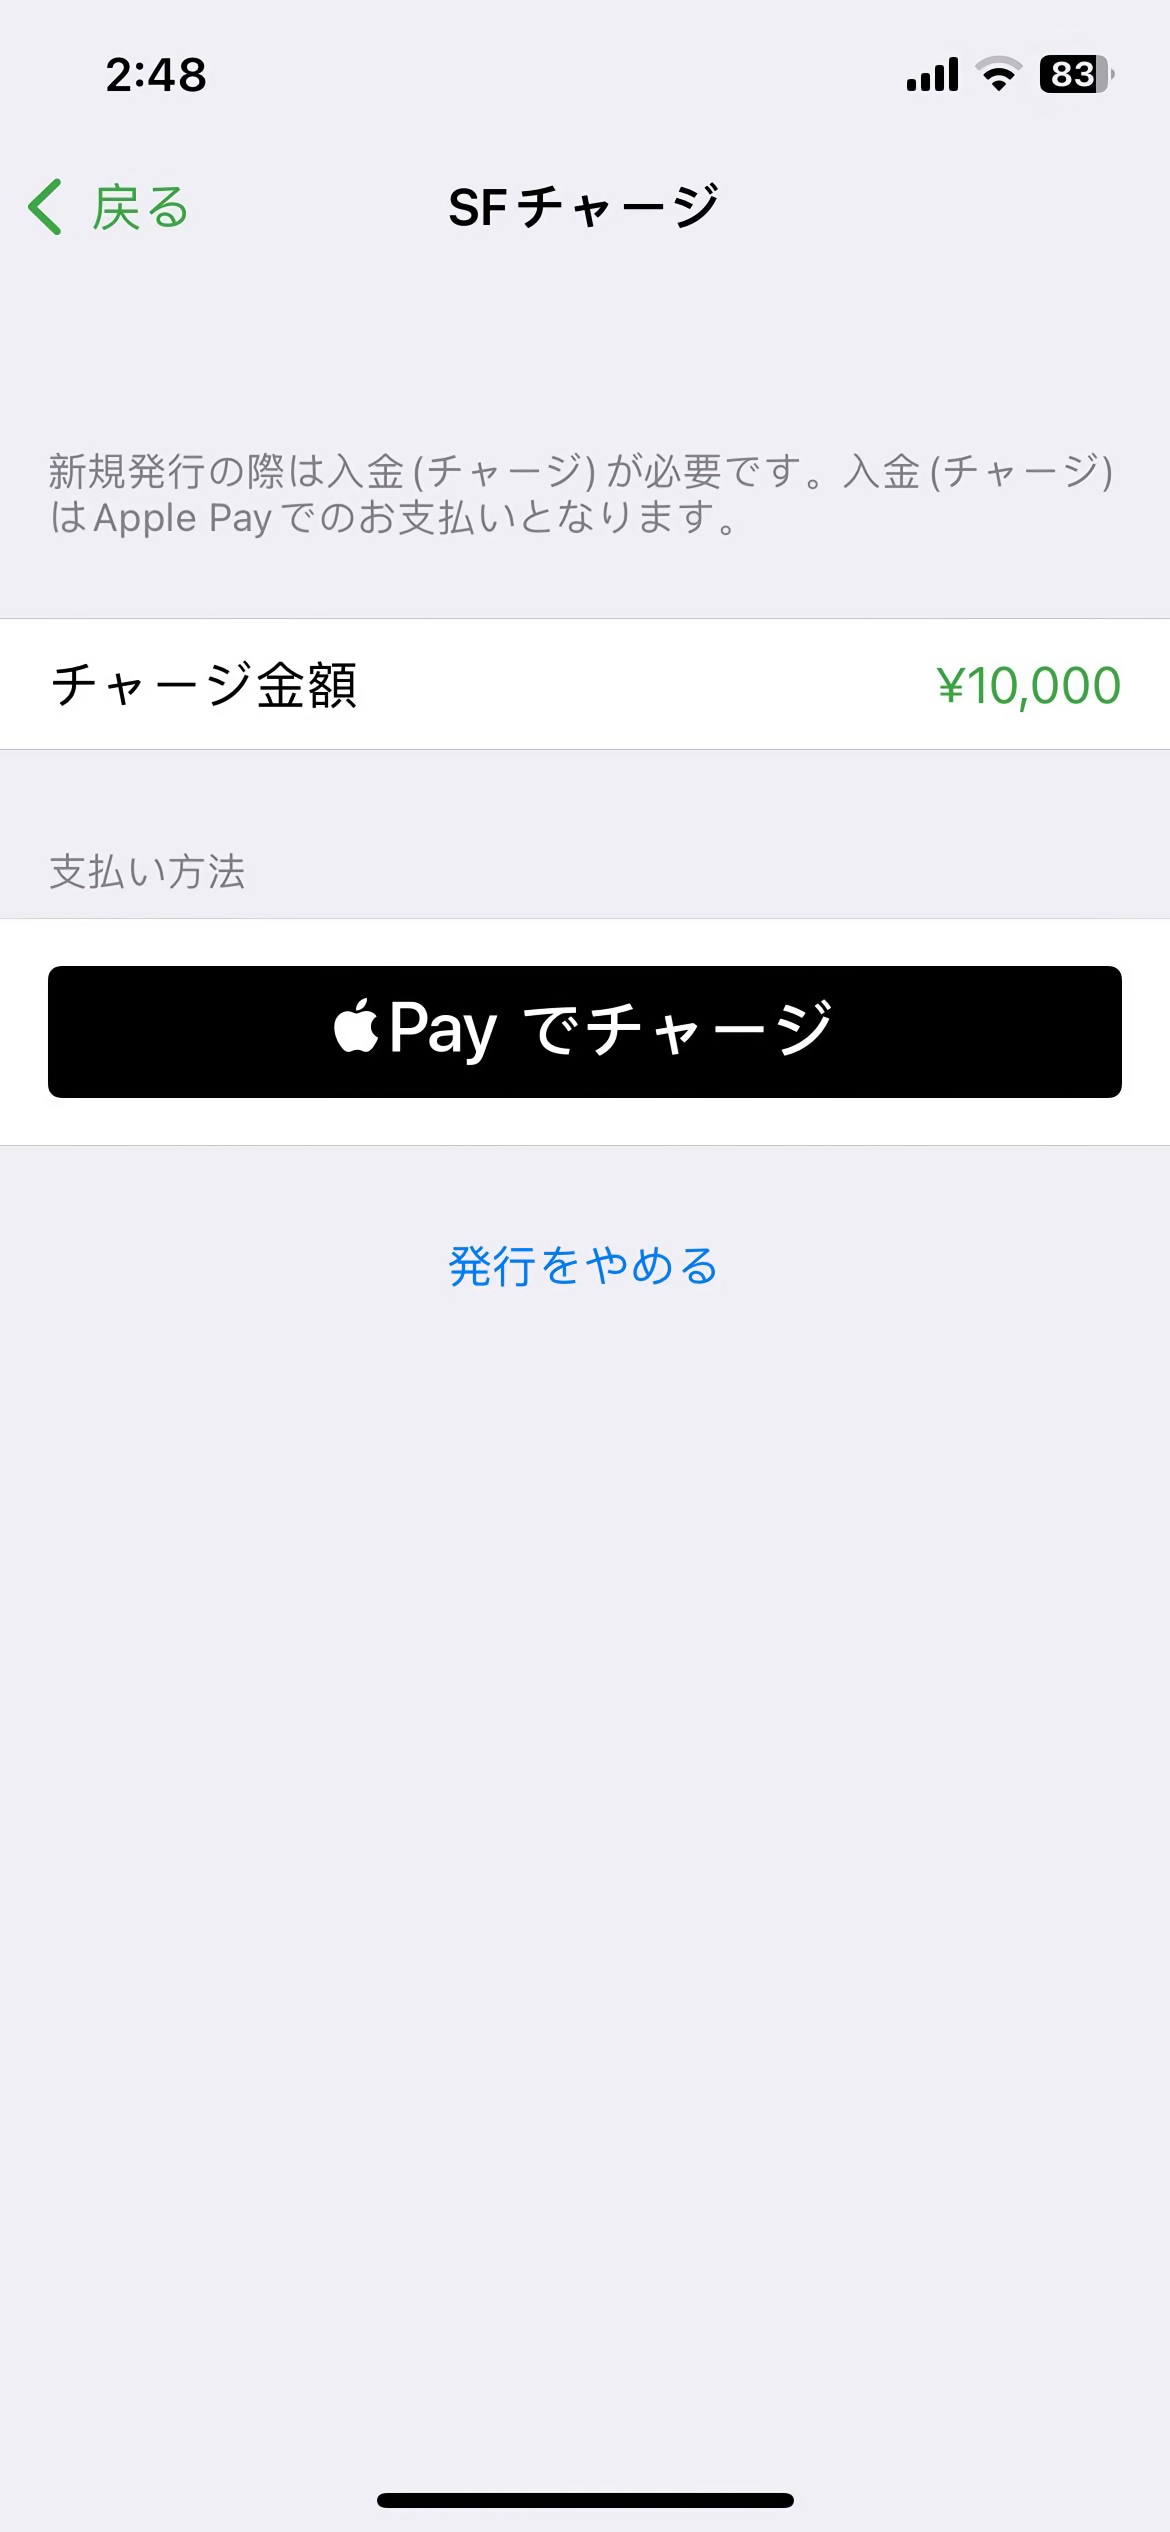
Once you have selected a balance, tap the Apple Pay button to load the initial funds. You will be charged in Japanese yen. If possible, use a card without foreign transaction fees.
You will then be prompted to add the card to the Wallet app. It might take a few minutes before the card is ready to use.
Generating a new card with the Suica app (2017)
Update: There’s now an English version of the Suica app, SuicaEng. You can download that instead of following these instructions for using the Japanese app.
Update 2: The SuicaEng app has been discontinued.
Download the Suica app on the App Store, then follow the screenshots below because the app doesn’t have an English localization.
Tap the + button in the top right corner. It will take you to the page below. Tap the first option:
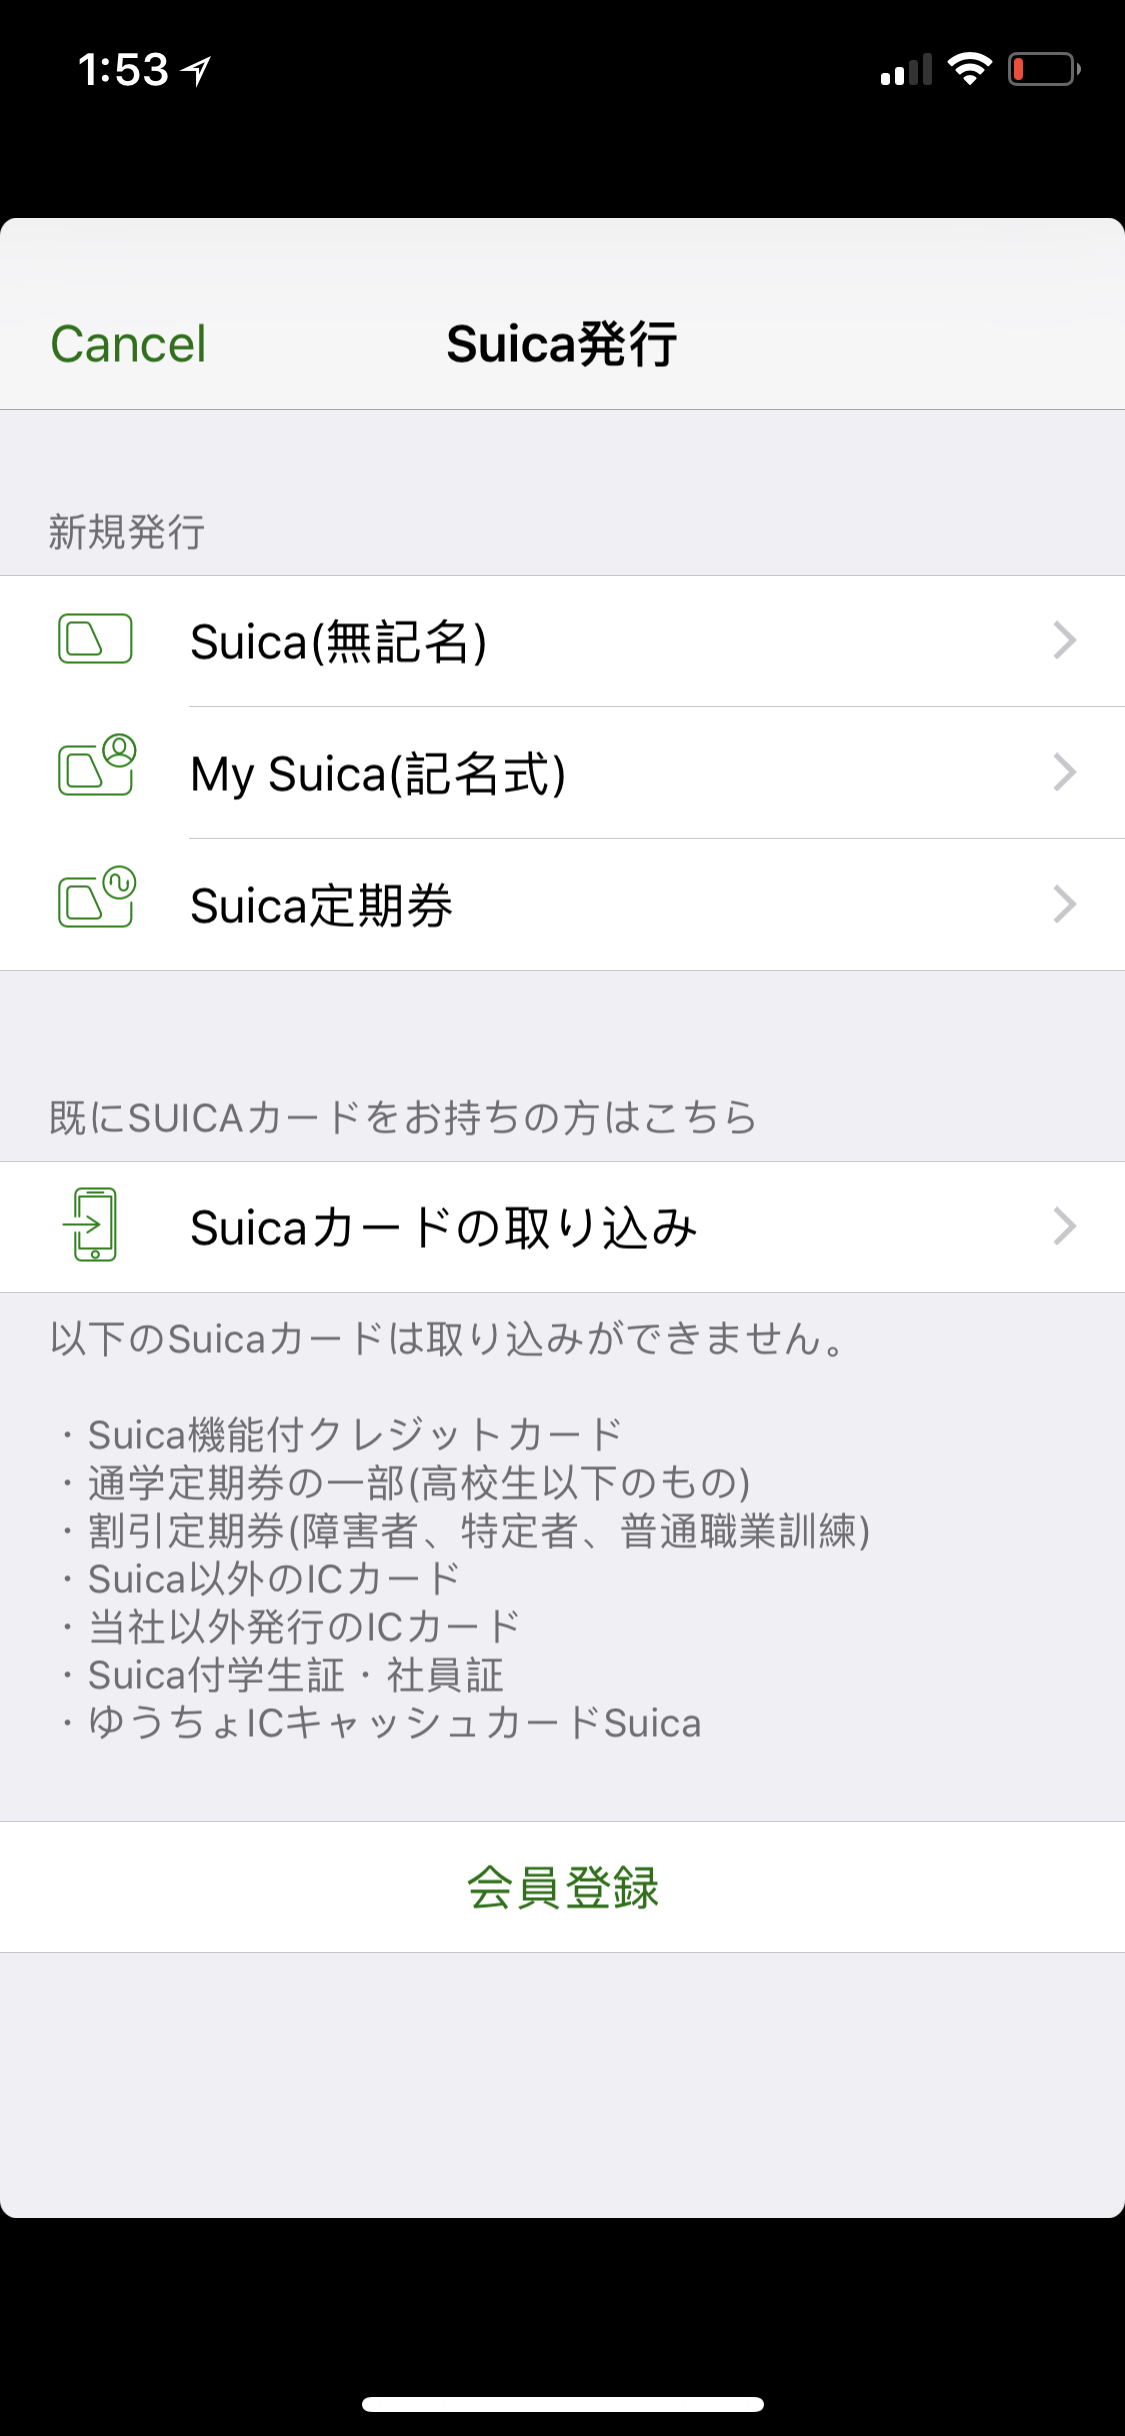
Tap the button in the top right corner to continue. In the alert that appears, tap the second option.
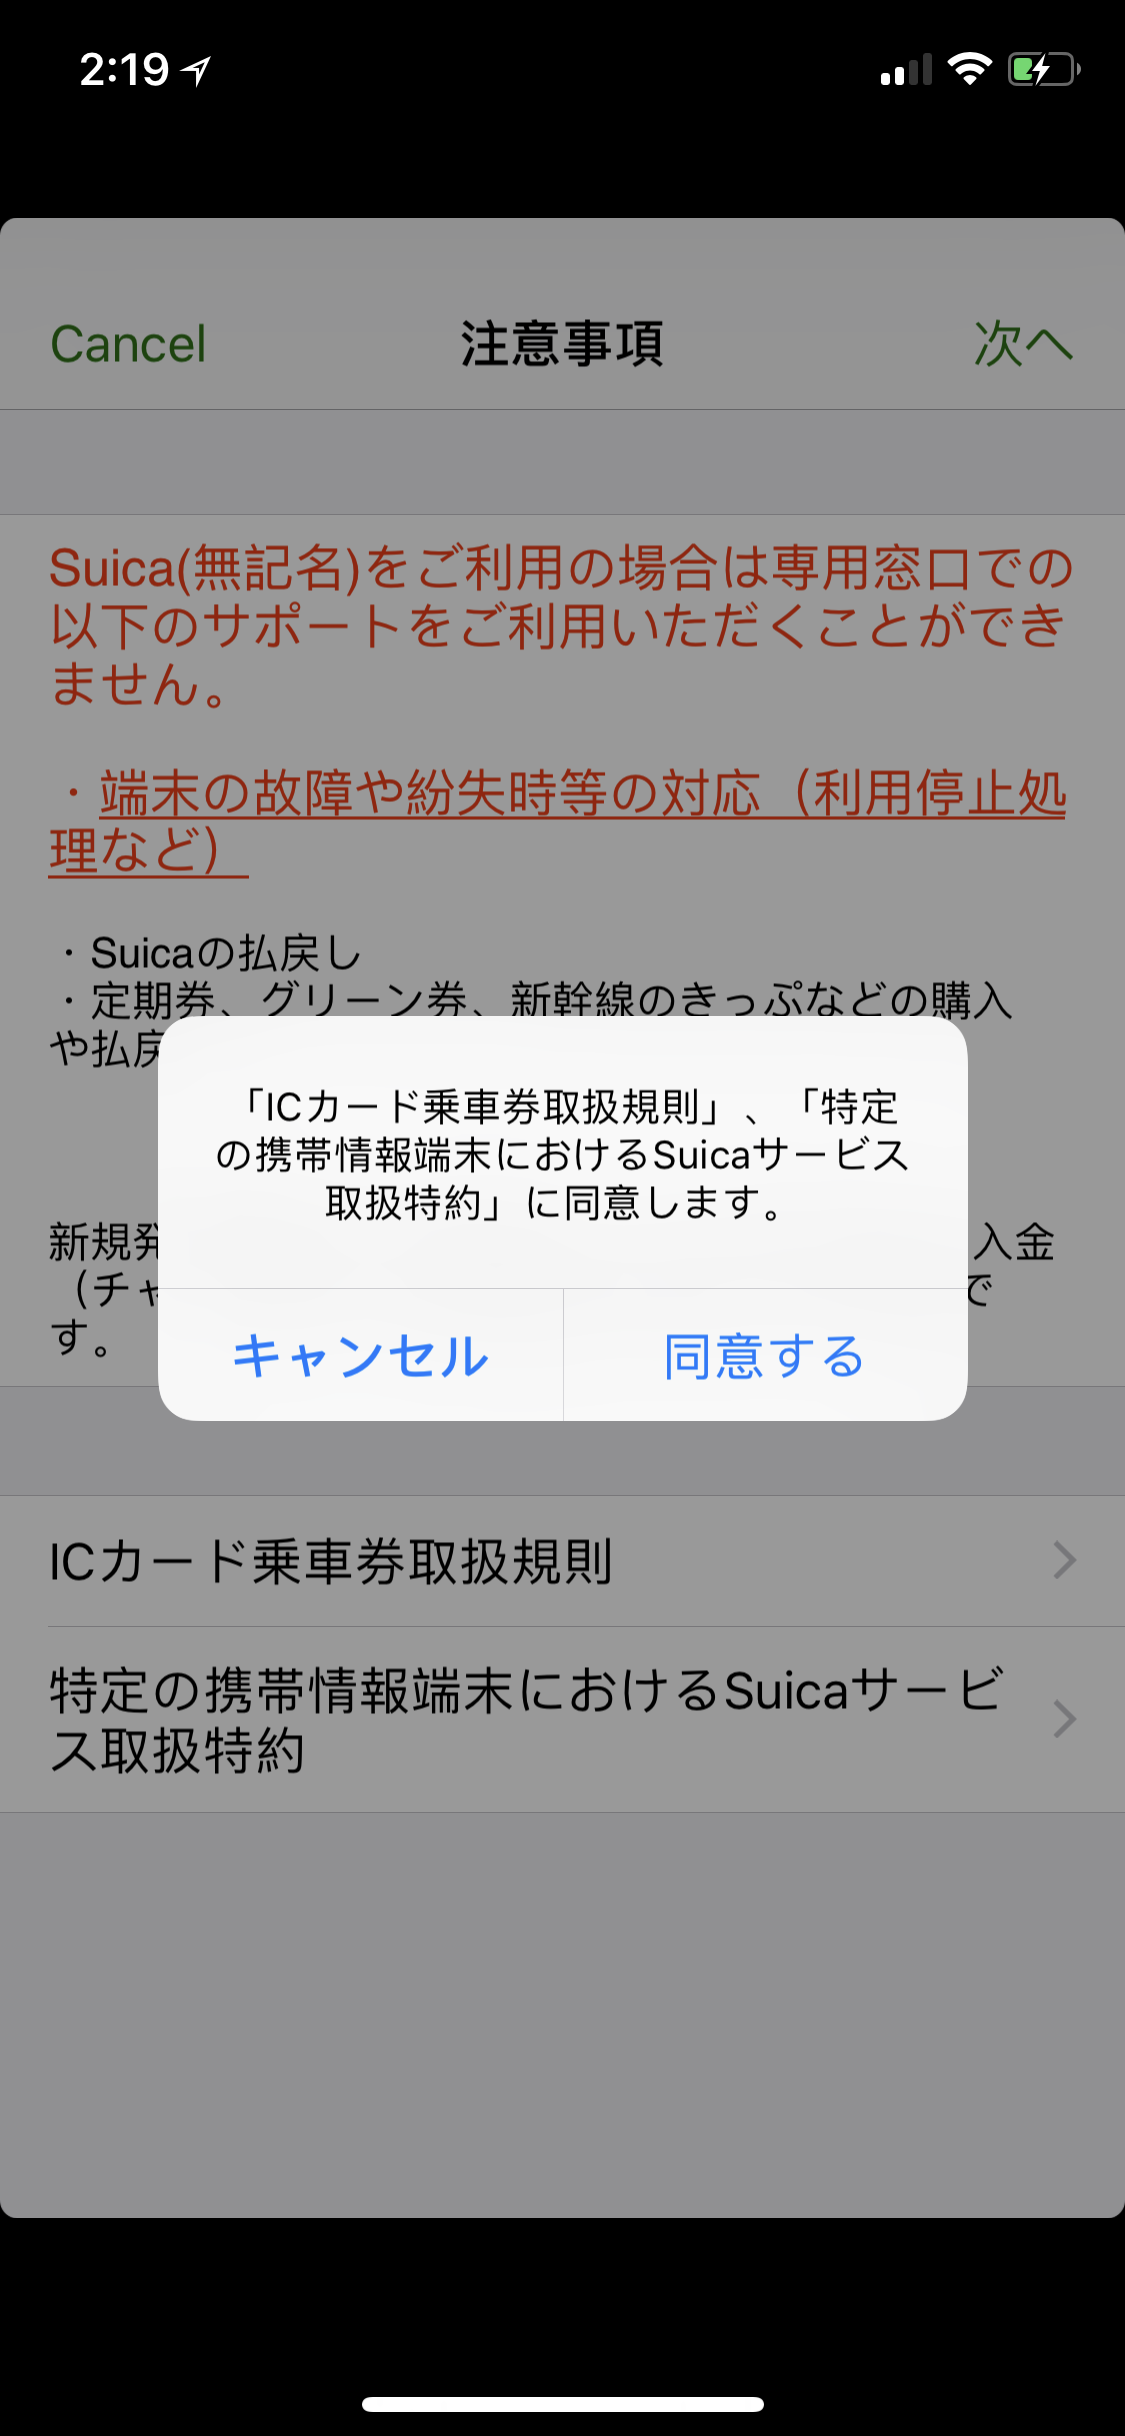
Tap the table cell to set the initial balance of the card.
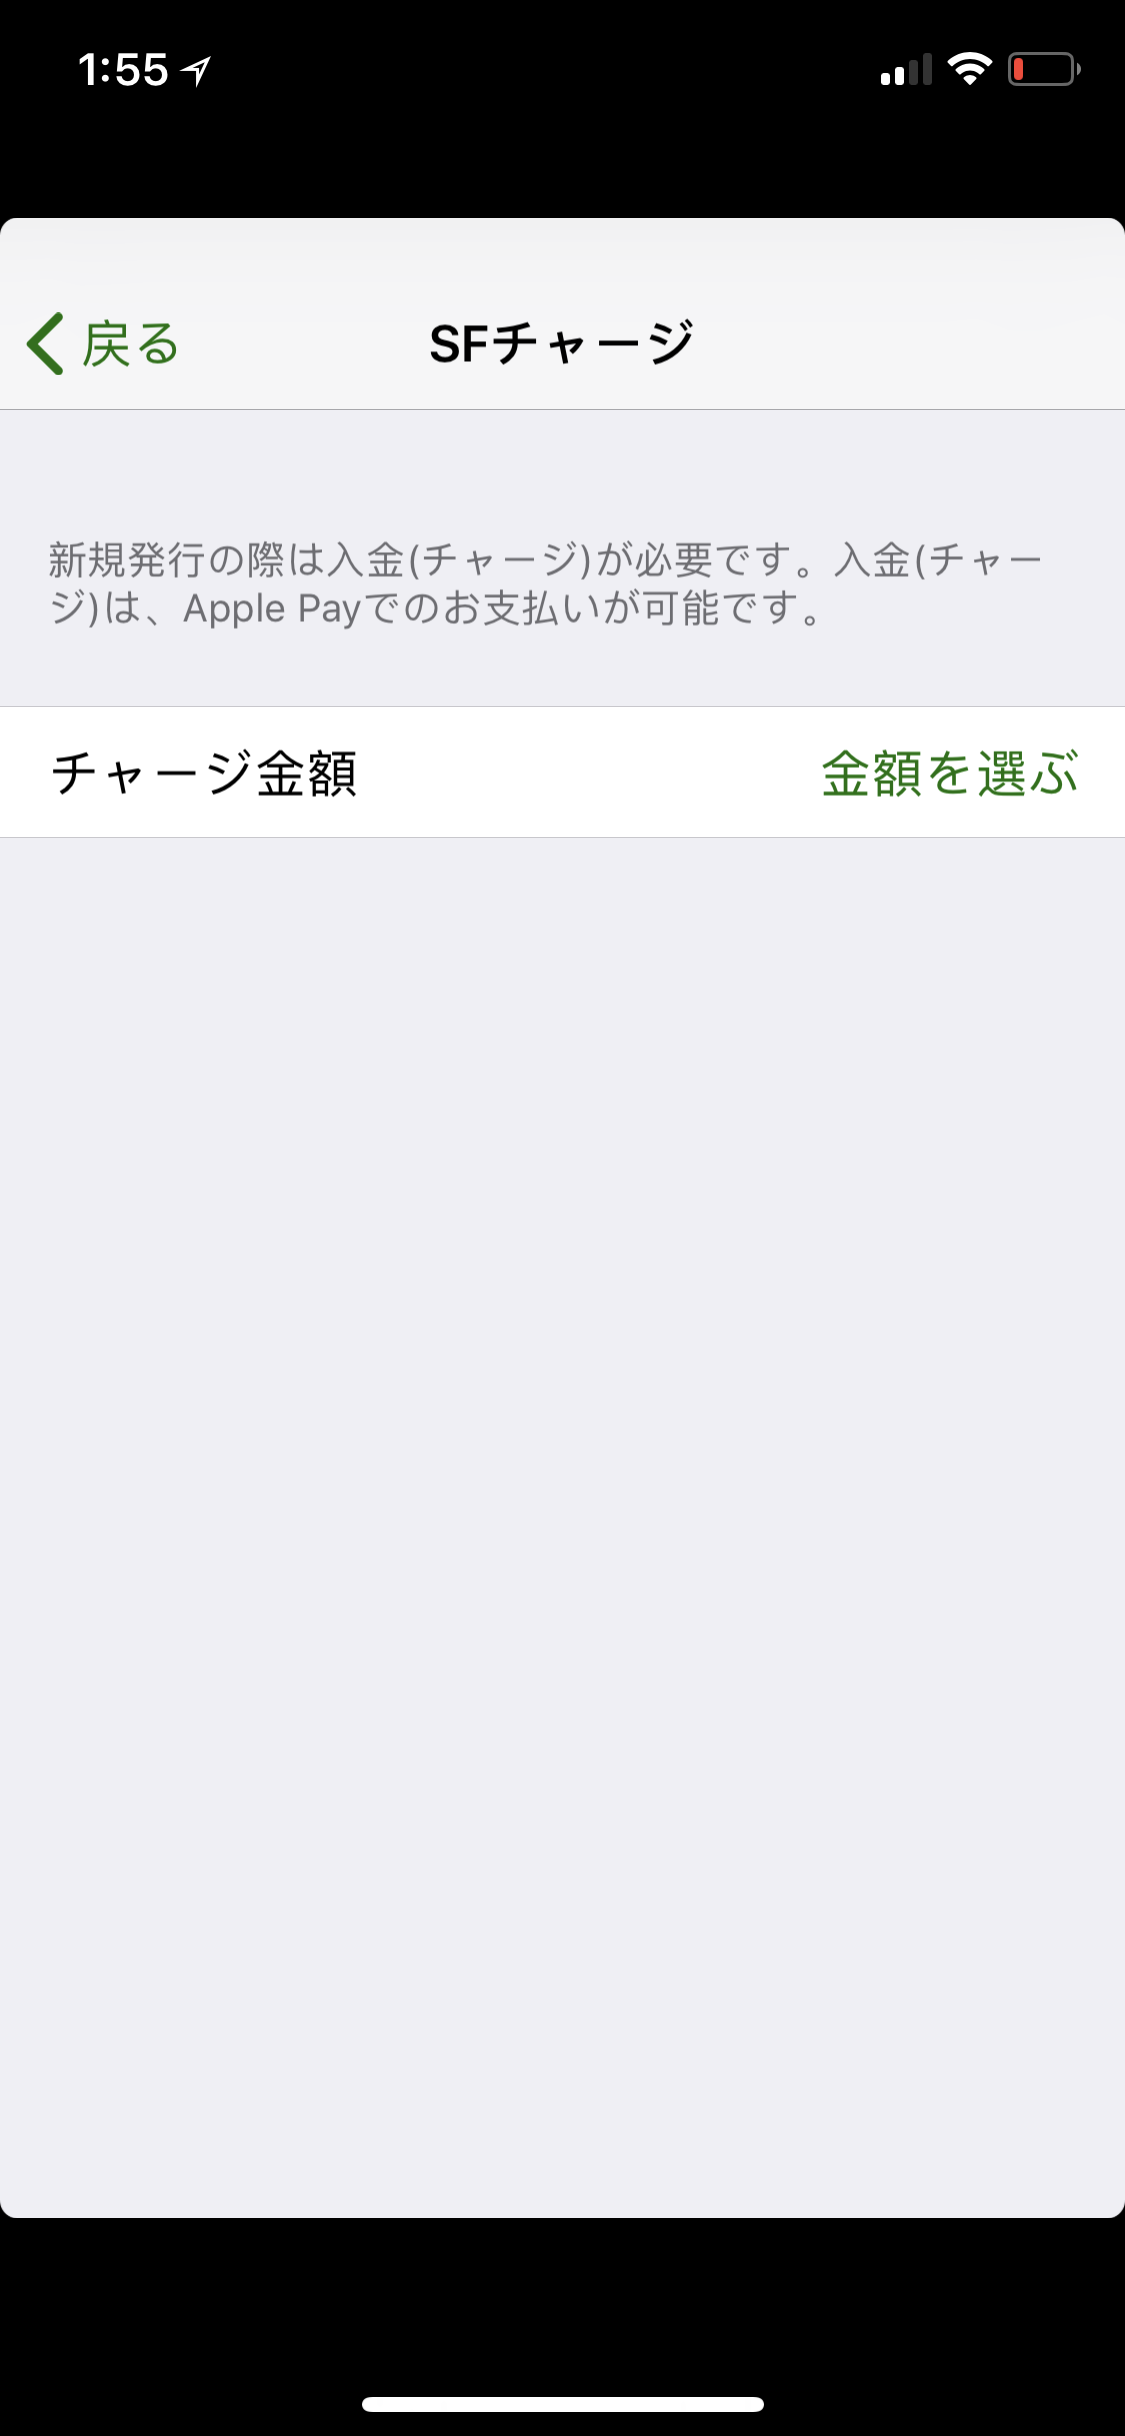
After this, tap the Apple Pay button to pay for your new card. You’ll be charged for the initial balance, and maybe a foreign transaction fee depending on your bank. Follow the instructions to add the card to the Wallet app.
If you need to move your Suica to a new phone
On the old phone:
- In the Wallet app, tap the (i) button next to the Suica.
- Scroll to the bottom and delete the Suica from this phone.
On the new phone:
- Open Settings > General > Language & Region. Make sure your Region is set to
Japan.
- You don’t need to change the Language setting.
- In the Wallet app, tap the + button.
- Don’t forget to change your region back to what it was before!
-
Use Suica, PASMO, or ICOCA cards on iPhone or Apple Watch in Japan. Apple Support. ↩
-
The iOS Wallet app can also create a new Suica card without needing to install the Suica app. However, the Wallet app requires a Japanese payment card to load the Suica, making this approach not suitable for travelers. ↩